


Repairing a leather car seat overview
Below we show you step-by-step how to repair a leather car seat. We’ll be repairing the faded leather on a BMW car seat bolster in dakota beige; the rest of the seat is just dirty and needs cleaning.
We also have guides showing you how to repair a hole in a leather car seat, how to restore leather car seats (if you need to restore the full interior) and how to change the colour of leather car seats.
We’ll be using the Leather Colourant Kit to repair the car seat, which includes all the product needed to prepare the leather, restore the colour and seal it afterwards. The car seat we’re repairing is from a BMW and so we have also selected the correct colour from our BMW Colour Chart that contains all of the popular BMW leather colours; in this case it is Dakota beige.
All the products can be found in the leather car seat repair section of our website.
Watch – how to repair a leather car seat
Step 1 – Clean the leather
This step is not crucial, but we recommend cleaning the full car seat (or interior) before making any repairs. Cleaning the areas you aren’t going to repair will help the colour blend in better with the rest of the seat.
To clean the leather, use our Leather Care Kit
Step 2 – Preparation
To ensure the colourant will stick to the leather properly, it needs to be prepped. This is the process of removing the manufactured finish applied to leather in the tannery. We do this using our solvent cleaner ‘Leather Prep’ and an abrasive pad.
The prep is poured onto the cotton wool balls and placed into the abrasive pad; rubbing the leather with this will remove the finish. You’ll know when the finish has been removed because you will see either:
- Colour being removed onto the pad. Or,
- Dulling of the leather (i.e. it will look matt).

You can see in the last image the finish has dulled and also some colour has been removed.
Once the surface has been prepped you should wipe away any excess prep from the surface with a cloth. If you are repairing the leather on an older car seat (pre 1990, but not exclusively), the prep can sometimes remove the finish and coloured coating completely. This isn’t a problem, but it’s important to make you aware to avoid any surprises!
If you have any bad creases or cracks you can also remove these with the abrasive pad and prep.
Once prepped, dampen the cloth in Alcohol Cleaner and wipe over the surface. This will remove any residues left from prepping and, also remove any waxes or silicones that may be present on the leather.
Step 3 – Making repairs to the leather
Before applying the colour, if the leather needs to be repaired this is the time to do it. This could be fixing holes, tears or cracks and we have a full range of leather repair products to help with this if needed.
Step 4 – Applying the leather repair colour
Make sure the leather is thoroughly dry from preparation. If you have the time, leave it overnight for best results.
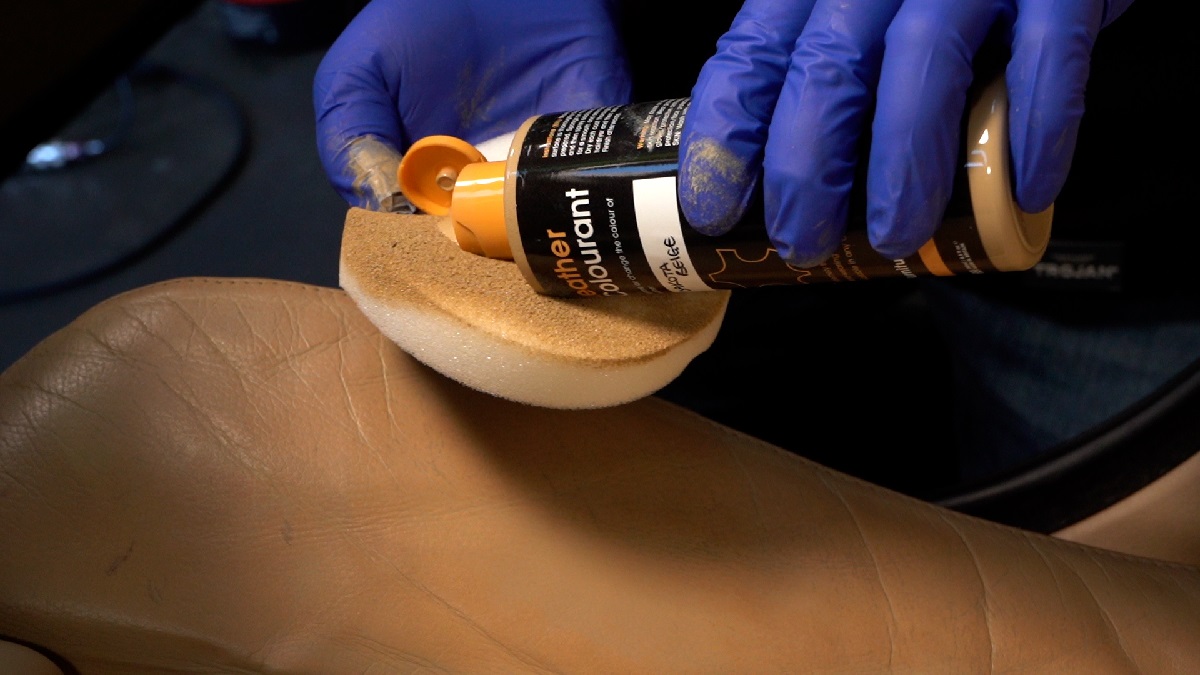
Apply the first coat of colour with a sponge, working it into any gaps and creases. It is then best to dry the colour using a hair drier, although it can be left to dry naturally. A hair drier will dry it within seconds whereas naturally could take up to 10 minutes depending on the room temperature.
You can continue to apply additional coats with the sponge to fully restore the colour but, for best results we recommend spraying the Colourant on using an airbrush (all spraying equipment is included within the kit).
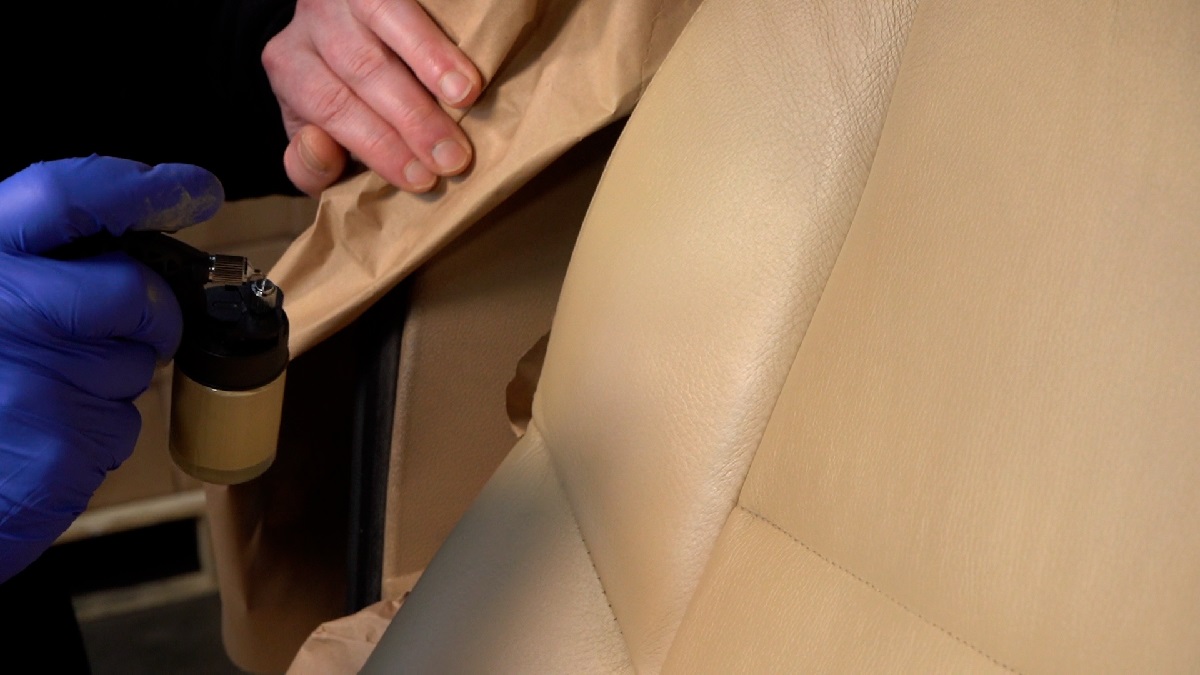
For best results spray the Colourant onto the leather using the airbrush provided in the kit.
Step 5 – Applying the Finish
The Leather Finish in the kit comes in Matt and Gloss. You can use either ‘as is’ if you want a matt or gloss finish, or you can mix the finishes together to achieve your desired finish (each kit contains matt and gloss). We like semi-matt for car seats, which is 25% gloss and 75% matt.
The kit also includes Cross Linker Eco, this should be added to the Finish in a ratio of 1:8 (15ml Cross Linker to 125ml Finish). Once applied, the finish will stop the colour from scuffing or scratching off, and it meets the British Standard for leather finishes; meaning your restored leather is as good as a new piece!
The Finish is sprayed onto the leather and dried with a hair drier. Once you’ve restored the leather, leave it to cure for 24 hours before using it; the restored leather will then last roughly the same length of time it took to become worn in the first place. However, maintenance with the Leather Care Kit will prolongs its lifespan.
Leather Car Seat Repair – the results
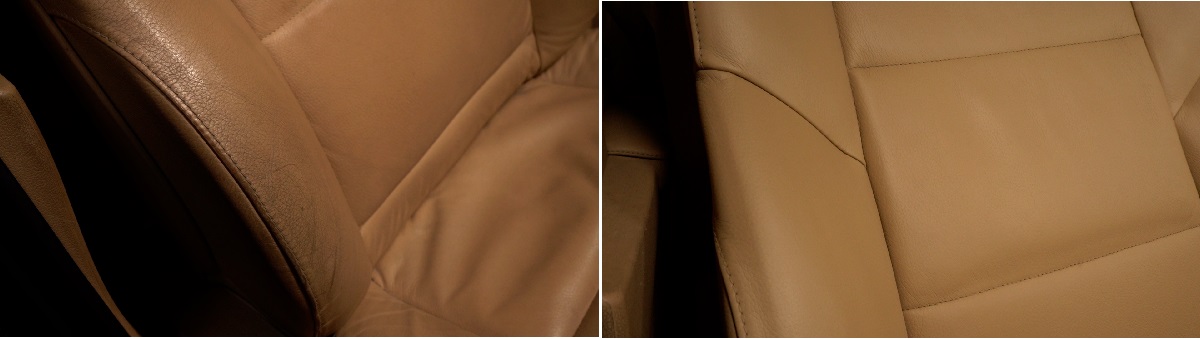
You can see the dirty, worn look on the left image (before) and how clean and fresh the reparied car seat looks on the right. This was done using our Leather Colourant Kit.


