This guide will show you how to fix a burn in leather such as a cigarette burn. Sometimes burns penetrate the leather all of the way through, and so this guide can also be used to demonstrate how to repair a hole in leather as well.
To fix the burn you will just need a Leather Repair kit to repair the hole and restore the colour.
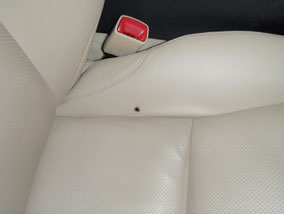
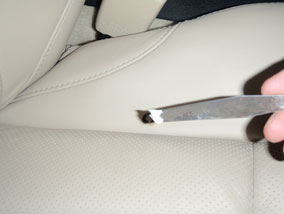
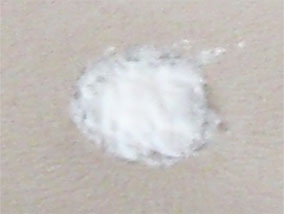
STEP 1. CUT OUT THE BURNED LEATHER
A burn causes the leather to shrink inwards creating a wrinkled effect and turning the leather hard.
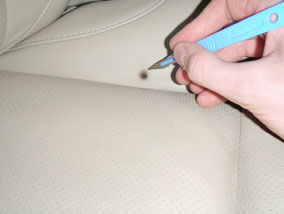
The first step is to partially cut the burn out. Cut a cross into the burn about half the depth of the leather and then proceed to cut the burn out cutting around the edge with a scalpel. Again, only about 50% depth into the leather.
This method of cutting can be used on burns that have not completely penetrated the leather, for those that have, cut the burn completely out of the leather. This will leave a hole that can then be repaired.
Go to step 4 if your burn didn't go all of the way through the leather and you didn't have to make a hole.
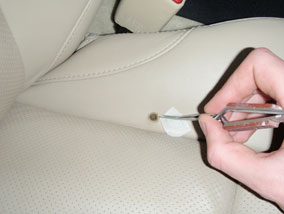
STEP 2. INSERT THE SUB-PATCH UNDER THE LEATHER
Using tweezers insert the canvas cloth flat behind the leather, ensuring at least a 1cm overlap surrounding all edges of the hole. Then apply the glue, as demonstrated in step 3.
STEP 3. APPLY GLUE TO FIX SUB-PATCH IN PLACE
The glue is applied with a thin object like the scalpel or paint stirrer. Push one side of the hole down to raise the other side, then wipe the glue onto underside edges of the hole and stick down. Repeat this so glue is applied around all edges, ensure that there is sufficient glue applied to firmly stick the patch to the underside of the hole.
Wait 20 minutes for the glue to set.
Now that we have a strong backing in place for the repair, we can apply some heavy filler into the hole to start to fill it.
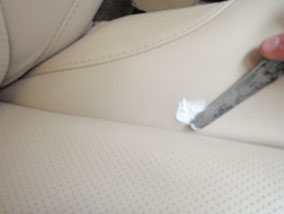
STEP 4. FILL THE HOLE USING HEAVY FILLER
If you are filling a hole, you need to apply about 4 thin layers of heavy filler, drying each layer off with a hair drier and pressing it down as you do so. This avoids shrinkage.
If you have only slightly cut a burn out, then apply two thin layers of filler.
Apply a small amount of filler into the hole with the palette knife and then wipe the excess from the side of the hole.
Dry thoroughly with a hair drier for 3 minutes and then leave it for a further 3 minutes. Gently press the filler down with your finger and re-peat the process until the filler is just below the surface of the leather.
Once you are ready to apply your last layer of filler, wipe it over the hole so that the filler stays level with the leather.
STEP 5 (OPTIONAL). RECREATE GRAIN PATTERN
This step is not 100% crucial as it involves embossing a textured grain pattern into the filler. This isn't necessary to do for most repairs, but we recommend it if you want a perfect finish or are using it as a professional.
To get the grain pad for this step, either purchase a ready-made grain pad or get our kit where you can take a custom grain pattern from your leather - Grain Copier Set
Alternatively, you could use our Grain Repair product to replace the grain by hand.
With the heavy filler level with the leather surface, place the grain pad onto the filler and press it down gently. Remove the grain pad after pressing it down and then dry the filler off with a hair drier.
Leave to set for 5 minutes and then gently sand the leather's surface to make smooth. This photo shows a close up of the damaged area with the texture applied to the filler.

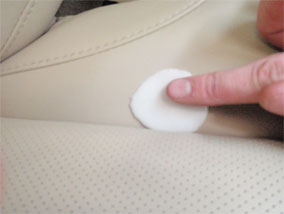
STEP 6. APPLY THE COLOURANT TO DISGUISE REPAIR
Using the Leather Touch Up Kit, match the colour of the leather or, send a piece of leather to us for colour matching. Also check our database to see if we have already matched your colour before -Colour Charts.
Apply the colour to the filler with a cotton wool bud and dry with a hair drier, leave for 1 minute and apply more colour until it blends in perfectly.
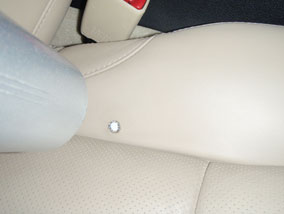
RESULTS!
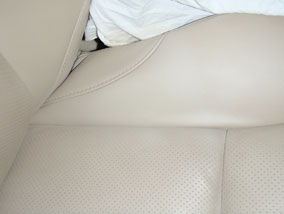
This photo shows the finished seat.
The colour coat is applied by just applying the colour to the filler until it becomes totally opaque.
Then, sponge some colour onto the filler and further around it to blend it in with the leather.
Then sponge the finish onto the area to match the sheen.
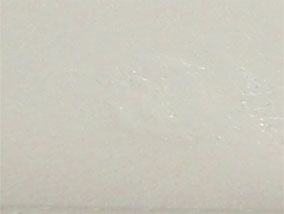
This is an enhanced image of the above photo.
We have zoomed into the area where we repaired the burn to show you how getting the correct grain pattern and colour, can make for an invisible repair.

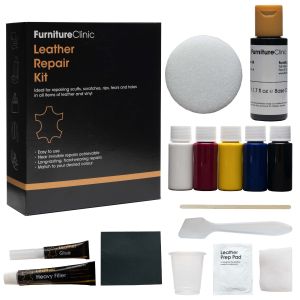
 Leather Repair Kit
Repair small tears, scuffs & scratches, and touch up colour loss. Works on all items of leather a...
From £26.95Leather Repair kit for repairing small tears, scuffs, scratches and to touch up colour loss to all items of leather or vinyl.
- Simple and easy-to-use repair kit
- Contains all you need to repair different types of damage
- Matches any colour of leather
- Suitable for all leather types and vinyl
- No experience or technical ability required
- Near invisible repairs achievable
- For use on chairs and sofas, car seats, handbags and more
- Long-lasting, hard-wearing repairs